Español
 Français
 China
China
How to Set Up a Fully Automatic Stripping Roll Die Cutter for Paper Bowl Blanks
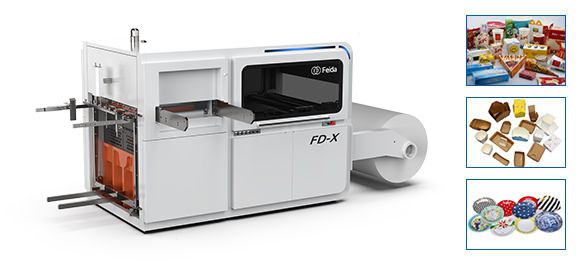
A paper bowl converter switches from cup production to large‑diameter soup bowls. The die‑cutting line stops after every few hundred sheets—waste clogs the stripping pins, bowl blanks tear at the crease lines, and the operator spends more time clearing jams than running production. The difference between a smooth setup and a shift of frustration is a systematic approach. A Full Stripping Roll Die Cutting Machine like the FDQF series integrates die‑cutting, creasing, and waste stripping into a single pass—but only when the die is properly mounted, the stripping pins match the waste pattern, and the pressure is tuned to the board grade. This guide walks through the complete setup process for paper bowl blanks: understanding the geometry, preparing the die and stripping tools, aligning the magnetic cylinder, and adjusting stripping pressure for different board weights. Each section assumes you are working with an FDQF‑class roll die cutter with a maximum cutting pressure of 280 tons, a maximum web width of 1050mm, and a paper weight range of 200–500 g/m².
Why bowl blanks are different from cup blanks
Paper bowl blanks are larger, often more complex in shape, and contain more waste area than cup blanks. A typical bowl blank includes:
-
A large central disc that becomes the bowl bottom
-
A curved side wall section that wraps around the forming mandrel
-
Multiple waste areas between the side wall sections
-
Crease lines that guide the forming process
Bowl blanks have larger waste areas compared to cup blanks, especially at the connection between the bottom and the side wall. Improper stripping settings leave waste clinging to the blank, which jams the forming machine downstream. Pre‑creases in bowl blanks are more critical than in cups—the bowl side wall must fold precisely during forming. If the creasing rule height is too low, the bowl will not form round; if too high, the board cracks.
Understanding the waste pattern
Before mounting anything, study the die layout. Identify every area that will become waste—the matrix of scrap surrounding the bowl blanks. Mark the locations where waste bridges (small uncut sections) hold the blanks in the web until the stripping station. These bridges must be broken by the stripping pins. If the pin pattern does not align with the waste bridges, the blanks will not release cleanly.
Preparing the die and stripping tools before mounting
Never mount a die without inspecting it first. Check the cutting rules for visible nicks, burrs, or wear. A 0.1mm defect in a cutting rule will appear as a rough edge on every bowl blank. Run a finger lightly along the rule—any inconsistency means the die needs reconditioning. Measure the creasing rule height. For paperboard in the 200–500 g/m² range, creasing rules should be 0.2–0.5mm lower than cutting rules. If the crease is too deep, the board cracks during forming; if too shallow, the bowl side wall will not fold correctly. Examine the stripping pins. The stripping unit uses an array of fixed or spring‑loaded pins to push waste out of the cut blanks. Match the stripping pin configuration to the waste pattern of the bowl blank. A pin located over a solid area will damage the product. A pin missing from a waste island will leave scrap attached.
A practical walkthrough for mounting and alignment
Positioning the magnetic die cylinder
The FDQF series uses a magnetic cylinder to hold flexible dies in place. Before mounting, ensure the cylinder surface is clean. Any debris under the die will lift the cutting rule, creating an uneven cut depth. Position the die so its leading edge aligns with the cylinder‘s reference mark. The magnetic force will hold the die flat against the cylinder surface, but you can slide it slightly before fully seating. Use the machine’s HMI touchscreen to jog the cylinder to the home position. The FDQF‘s servo positioning system provides precise control over die placement—take advantage of it.
Fine‑tuning the circumferential registration
After the die is mounted, run a test sheet at low speed (30–50 cuts/min). Compare the cut position against the registration marks printed on the paper web. The FDQF uses a photoelectric registration system to read color‑to‑color register marks. If the cut is off, adjust the circumferential register through the HMI. Most adjustments require only a few milliseconds of timing change. Run another test sheet and repeat until the cut falls within ±0.10mm of the target. The FDQF series achieves cutting precision down to ±0.10mm when properly aligned.
Setting the stripping unit‘s ejector plate stroke
The stripping unit uses an ejector plate that pushes waste pins into the web at the precise moment after cutting. If the ejector stroke is too short, the pins will not penetrate the waste bridges. If too long, the pins can mark the product blanks. Start with the ejector plate at its highest position (closest to the die cylinder). Run a test strip and observe waste removal. If waste remains attached, increase the ejector stroke incrementally until the waste falls cleanly. If the pins leave indentations on the bowl blanks, reduce the stroke slightly.
Adjusting stripping pressure for different paperboard grades
The FDQF series can handle paper from 180 to 600 g/m², with a maximum cutting pressure of 280 tons. But the stripping pressure—not just cutting pressure—must be tuned to the board grade. For coated 250gsm bowl board, the coating acts as a lubricant. Waste releases more easily. Use lower stripping pressure (approximately 30‑40% of maximum). Higher pressure can crush the coating and leave edge marks on the blanks. For uncoated 400gsm bowl board, the fibers are more abrasive and the waste holds tighter. Use higher stripping pressure (60‑70% of maximum) and inspect pins for wear after each run. When running recycled or high‑filler board, which is more brittle, reduce stripping pressure by 20‑30% to prevent cracking along the crease lines. The FDQF‘s electric pressure control system allows adjustments through the HMI, eliminating manual guessing.
Test run and quality checks
Before committing to a full production run, test the setup with 50 bowl blanks. Do not skip this step.
What to look for in the first 50 bowl fans
Edge quality. Inspect the cut edges under good lighting. No fuzz, no tears, no rough spots. The FDQF‘s precision of ±0.10mm should deliver clean edges on properly maintained tooling.
Waste removal. As the blanks exit the stripping station, waste should fall freely into the scrap collection bin. If any waste clings to the blanks, stop and adjust stripping pin height or ejector stroke.
Crease integrity. Fold a test blank along the crease lines. The board should fold cleanly with no cracking on the printed surface. If cracks appear, the creasing rule may be too high or the board moisture content too low.
Blank dimensions. Measure the length and width of several blanks. All should be identical within ±0.10mm. If variation appears, check web tension and die cylinder alignment.
Common setup mistakes and how to avoid them
Forgetting to align the stripping frame with the die cut. The stripping unit‘s ejector plate must mirror the die cut pattern exactly. If the stripping pins are offset by even 1mm, they will miss the waste bridges and leave scrap attached. Before locking the stripping frame, place a test sheet under the pins and manually cycle the machine to verify pin placement. Using the same stripping pins for multiple products. A bowl blank with a different geometry requires a different stripping pin configuration. Keep separate pin sets for each product, labeled by bowl size and board grade. Installing the wrong pin set is a waste of setup time. Ignoring the photoelectric registration system. The FDQF‘s registration system is there for a reason. If the color marks drift, the HMI will show an alarm. Do not disable it—adjust the web tension and re‑sync the marks. The FDQF uses a photoelectric correcting deviation system to maintain precise positioning through every cycle.
Your questions about bowl blank die‑cutting, answered
Q: Can the same stripping pin configuration work for both cup and bowl blanks? A: No. Cup blanks are narrower with different waste patterns. Bowl blanks have larger waste areas, especially around the bottom disc. A dedicated pin set for each product is essential.
Q: What is the maximum cutting pressure for 500gsm bowl board? A: The FDQF series delivers up to 280 tons of cutting pressure, sufficient for 500gsm board. However, stripping pressure should be tuned lower than maximum to avoid damaging the board‘s surface finish.
Q: How often should stripping pins be replaced? A: Inspect pins after every 100,000 cycles. Replace any pin with a rounded or flattened tip. Worn pins will not penetrate waste bridges fully, leaving scrap attached.
Q: Does the FDQF machine require a dedicated operator for setup? A: The FDQF is designed for stable operation once the die and stripping tools are correctly installed. Setup requires a trained operator, but during production the machine runs automatically with minimal intervention.
When to call for technical support
If test runs consistently fail to produce clean bowl blanks despite following these steps, deeper issues may exist. Check the die cylinder for runout—excessive eccentricity will cause uneven cutting pressure across the web. Inspect the anvil roll for grooves worn by previous dies. The FDQF‘s imported key parts ensure high precision, but even the best components wear over time. For persistent registration errors, recalibrate the photoelectric system using the HMI guidance. Record your pressure settings, stripping pin configurations, and die position data for each product. When you call for support—whether from Feida or a third‑party service provider—this log will help the technician diagnose faster.
Feida‘s FDQF series is designed with a micro‑computer control interface, servo positioning, AC frequency converter, automatic counting, manual pneumatic lock plate, photoelectric deviation correction, centralized oil lubrication, overload protection, and a distinctive gearing system that ensures smooth operation and precise positioning.
→ Request a quote from Feida Machinery for the FDQF Full Automatic Stripping Roll Die Cutting Machine — Share your bowl sizes (diameter and depth), paperboard weight (g/m²), and monthly output target. Their technical team can recommend the right machine configuration and provide tooling specifications for your specific bowl blank design.